
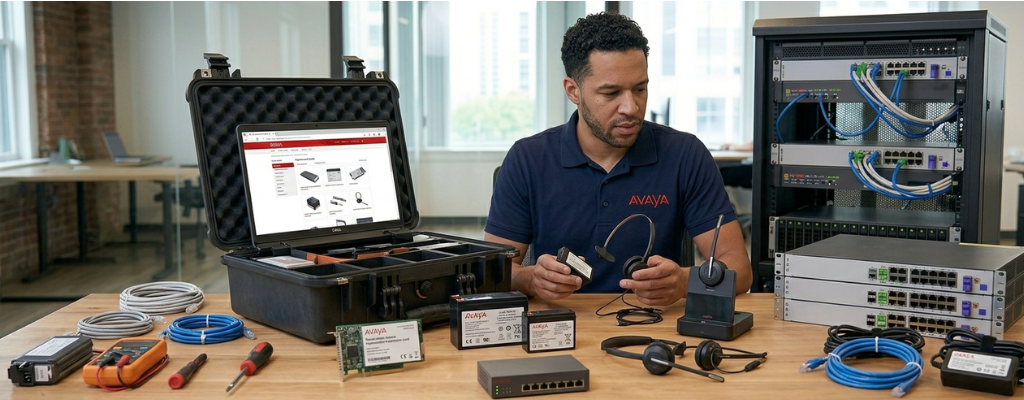
Avaya Hardware Replacement Guide: Modules, Batteries & Headsets | Morgan Birgé
Step-by-Step Guide to Replacing Avaya Expansion Modules, Batteries, and Headsets
Why Hardware Replacement Gets Overlooked
Most Avaya phone system problems get diagnosed as software or configuration issues, and often they are. But sometimes the fix is simpler and more physical: a module that needs swapping out, a battery that's past its life, or a headset that was never compatible to begin with.
This guide covers three of the most common hardware replacement tasks on Avaya systems. Each one is straightforward when you know the correct steps and what to watch for.
Part 1: Replacing an Avaya IP500 Expansion Module
What Expansion Modules Do
Expansion modules are the external units that connect to the Avaya IP500 V2 control unit to add phone capacity. They sit beside or beneath the main unit, connected by a short cable. When one fails, every phone running through it goes offline at once.
The IP500 V2 supports up to 8 external expansion modules as standard, and up to 12 if the system is fitted with an IP500 4-Port Expansion Base Card. Each module comes with its own external power supply unit and a 1-meter blue interconnect cable.
Before You Replace the Module
Check these things first; they resolve more problems than an actual module swap:
Firmware mismatch: If the module shows a solid red LED, it may simply be unable to load firmware from the SD card. Run the Upload System Files in IP Office Manager before ordering a replacement.
Grounding cable: A missing grounding cable between the module and the control unit causes intermittent failures that look like hardware faults. Verify it's installed and secure.
Power supply: Confirm the module's external power supply unit is plugged in and functional. A dead PSU is a quick fix compared to a module replacement.
How to Replace the Module
Step 1 - Back up the configuration. Export the full IP Office configuration from IP Office Manager before touching any hardware.
Step 2 - Power down in the correct order. Power off the expansion module first, then the control unit. Never remove a module while the system is running.
Step 3 - Disconnect the blue interconnect cable. Unplug the cable from both the module and the expansion port on the rear of the control unit.
Step 4 - Disconnect the power supply. Unplug the module's external PSU from the wall and from the module itself.
Step 5 - Install the replacement module. Connect the blue cable first, then the power supply. Use only the supplied blue 1-meter expansion interconnect cable when connecting to ports on the rear of the control unit. A yellow cable may be used only when connecting to an IP500 4-Port Expansion card; using the wrong cable can cause detection failures.
Step 6 - Power on in the correct order. Expansion modules must start before the IP Office control unit. Power on all expansion modules first, then power on the control unit. The control unit applies a short startup delay to detect modules that power on at the same time, but powering modules after the control unit can cause them to go undetected.
Step 7 - Verify detection in IP Office Manager. Once the system reboots, open IP Office Manager and confirm the new module appears correctly under the control unit configuration.
Part 2: Replacing the Battery in an Avaya Partner ACS System
Why the Battery Matters
The Avaya Partner ACS uses two AAA batteries to keep its programming in memory during a power outage. When they run low, the system displays a warning, "ReplaceSysBat W/Power On" on extensions 10 and 11. Ignoring it risks losing all system configuration if the power goes out.
What You Need
Two AAA alkaline batteries, name brand only, no rechargeables
The system must stay powered on during the entire swap
How to Replace the Batteries
Step 1 - Locate the processor module. Open the phone system cabinet and find the card labeled "Partner ACS Processor," typically in the upper section of the unit.
Step 2 - Open the battery compartment. The compartment sits at the bottom of the processor module, just below the extension jacks. Push in slightly on the cover, slide the black locking latch upward, and pull the tab to remove the battery tray.
Step 3 - Insert the new batteries. Match the + and polarity to the markings inside the tray. Seat both batteries firmly until snug.
Step 4 - Close and latch the compartment. Slide the cover back in and push firmly until the latch clicks. Hold it in place for a few seconds.
Step 5 - Wait for the warning to clear. The "ReplaceSysBat" message should disappear from the display within a few minutes.
If the Warning Won't Clear
Check polarity - Flip the batteries and recheck the + and orientation
Clean the contacts - Corrosion from old batteries can prevent a solid connection. Use a pencil eraser or a cloth lightly dampened with rubbing alcohol on the metal clips
Try a different brand - Off-brand batteries sometimes don't register correctly. Switch to Duracell or Energizer
Part 3: Replacing a Headset on an Avaya Desk Phone
Why Compatibility Matters More Than You Think
Avaya desk phones don't use a standard 3.5mm headset jack like smartphones and laptops do. They rely on a specialized RJ9 connector or a dedicated Electronic Hook Switch (EHS) port, which means a headset that works perfectly on a computer won't necessarily work on an Avaya phone without the right adapter or cable. Buying the wrong headset is the most common and most avoidable headset replacement mistake.
Corded Headsets
For most Avaya J100, 9600, and 1600 series phones, corded headsets connect via an HIS headset adapter cable or an RJ9 connector. Plantronics and Jabra corded headsets offer broad compatibility with Avaya J100, 1600, and 9600 series phones using HIS or GN1216 cables. Check the headset's packaging or product listing to confirm the correct cable type for your phone model.
To connect a corded headset:
Plug the HIS adapter cable into the headset port on the side or base of the phone
Connect the headset's Quick Disconnect (QD) cord to the adapter
Press the headset button on the phone to confirm audio routes are correct
Wireless Headsets
Wireless headsets require more care regarding compatibility. For Avaya J139, J159, J169, J179, and J189 phones, EHS (Electronic Hook Switch) capability is built in, but using it with wireless headsets requires either a Jabra Link 33 or Link 35 adapter, depending on the headset brand. For Plantronics/Poly wireless systems, the APV-63 EHS cable is the recommended adapter for J100 series phones.
Two important notes:
The J179 supports Bluetooth headsets natively, no adapter required for compatible Bluetooth devices. The J179 is the only model in the standard J100 range with built-in Bluetooth support.
The J129 does not have a dedicated headset port. The only compatible option is a wireless headset such as the Plantronics CS540; wired headsets cannot be used with this model.
After Connecting Any Headset
Test these before considering the replacement complete:
Press the headset button and confirm dial tone routes to the headset, not the handset
Make a test call and confirm the caller can hear you clearly
Confirm that the mute button on the headset works and reflects correctly on the phone display
For wireless headsets, confirm that remote answer (answering calls directly from the headset without touching the phone) functions as expected
A Note on Getting Parts
Replacement expansion modules and power supply units are available as refurbished units through reputable third-party vendors at significantly lower cost than new hardware. Carefully refurbished and tested IP500 expansion modules and cards are available at a fraction of the cost of new hardware from Avaya, a practical option for extending the life of an existing system. Verify that any refurbished module matches your exact model number before purchasing.
Need Help With a Hardware Replacement?
If a module won't come back online after replacement, a battery warning won't clear, or a new headset isn't working as expected, an experienced Telecommunication support company that offers Avaya maintenance and Avaya support can diagnose the issue quickly and get your system back to full operation without the guesswork.

We Can Help
Call us at (312) 728-7652 or fill out the form below.
Featured Posts
Avaya Hardware Replacement Guide: Modules, Batteries & Headsets | Morgan Birgé
Step-by-Step Guide to Replacing Avaya Expansion Modules, Batteries, and Headsets
Why Hardware Replacement Gets Overlooked
Most Avaya phone system problems get diagnosed as software or configuration issues, and often they are. But sometimes the fix is simpler and more physical: a module that needs swapping out, a battery that's past its life, or a headset that was never compatible to begin with.
This guide covers three of the most common hardware replacement tasks on Avaya systems. Each one is straightforward when you know the correct steps and what to watch for.
Part 1: Replacing an Avaya IP500 Expansion Module
What Expansion Modules Do
Expansion modules are the external units that connect to the Avaya IP500 V2 control unit to add phone capacity. They sit beside or beneath the main unit, connected by a short cable. When one fails, every phone running through it goes offline at once.
The IP500 V2 supports up to 8 external expansion modules as standard, and up to 12 if the system is fitted with an IP500 4-Port Expansion Base Card. Each module comes with its own external power supply unit and a 1-meter blue interconnect cable.
Before You Replace the Module
Check these things first; they resolve more problems than an actual module swap:
Firmware mismatch: If the module shows a solid red LED, it may simply be unable to load firmware from the SD card. Run the Upload System Files in IP Office Manager before ordering a replacement.
Grounding cable: A missing grounding cable between the module and the control unit causes intermittent failures that look like hardware faults. Verify it's installed and secure.
Power supply: Confirm the module's external power supply unit is plugged in and functional. A dead PSU is a quick fix compared to a module replacement.
How to Replace the Module
Step 1 - Back up the configuration. Export the full IP Office configuration from IP Office Manager before touching any hardware.
Step 2 - Power down in the correct order. Power off the expansion module first, then the control unit. Never remove a module while the system is running.
Step 3 - Disconnect the blue interconnect cable. Unplug the cable from both the module and the expansion port on the rear of the control unit.
Step 4 - Disconnect the power supply. Unplug the module's external PSU from the wall and from the module itself.
Step 5 - Install the replacement module. Connect the blue cable first, then the power supply. Use only the supplied blue 1-meter expansion interconnect cable when connecting to ports on the rear of the control unit. A yellow cable may be used only when connecting to an IP500 4-Port Expansion card; using the wrong cable can cause detection failures.
Step 6 - Power on in the correct order. Expansion modules must start before the IP Office control unit. Power on all expansion modules first, then power on the control unit. The control unit applies a short startup delay to detect modules that power on at the same time, but powering modules after the control unit can cause them to go undetected.
Step 7 - Verify detection in IP Office Manager. Once the system reboots, open IP Office Manager and confirm the new module appears correctly under the control unit configuration.
Part 2: Replacing the Battery in an Avaya Partner ACS System
Why the Battery Matters
The Avaya Partner ACS uses two AAA batteries to keep its programming in memory during a power outage. When they run low, the system displays a warning, "ReplaceSysBat W/Power On" on extensions 10 and 11. Ignoring it risks losing all system configuration if the power goes out.
What You Need
Two AAA alkaline batteries, name brand only, no rechargeables
The system must stay powered on during the entire swap
How to Replace the Batteries
Step 1 - Locate the processor module. Open the phone system cabinet and find the card labeled "Partner ACS Processor," typically in the upper section of the unit.
Step 2 - Open the battery compartment. The compartment sits at the bottom of the processor module, just below the extension jacks. Push in slightly on the cover, slide the black locking latch upward, and pull the tab to remove the battery tray.
Step 3 - Insert the new batteries. Match the + and polarity to the markings inside the tray. Seat both batteries firmly until snug.
Step 4 - Close and latch the compartment. Slide the cover back in and push firmly until the latch clicks. Hold it in place for a few seconds.
Step 5 - Wait for the warning to clear. The "ReplaceSysBat" message should disappear from the display within a few minutes.
If the Warning Won't Clear
Check polarity - Flip the batteries and recheck the + and orientation
Clean the contacts - Corrosion from old batteries can prevent a solid connection. Use a pencil eraser or a cloth lightly dampened with rubbing alcohol on the metal clips
Try a different brand - Off-brand batteries sometimes don't register correctly. Switch to Duracell or Energizer
Part 3: Replacing a Headset on an Avaya Desk Phone
Why Compatibility Matters More Than You Think
Avaya desk phones don't use a standard 3.5mm headset jack like smartphones and laptops do. They rely on a specialized RJ9 connector or a dedicated Electronic Hook Switch (EHS) port, which means a headset that works perfectly on a computer won't necessarily work on an Avaya phone without the right adapter or cable. Buying the wrong headset is the most common and most avoidable headset replacement mistake.
Corded Headsets
For most Avaya J100, 9600, and 1600 series phones, corded headsets connect via an HIS headset adapter cable or an RJ9 connector. Plantronics and Jabra corded headsets offer broad compatibility with Avaya J100, 1600, and 9600 series phones using HIS or GN1216 cables. Check the headset's packaging or product listing to confirm the correct cable type for your phone model.
To connect a corded headset:
Plug the HIS adapter cable into the headset port on the side or base of the phone
Connect the headset's Quick Disconnect (QD) cord to the adapter
Press the headset button on the phone to confirm audio routes are correct
Wireless Headsets
Wireless headsets require more care regarding compatibility. For Avaya J139, J159, J169, J179, and J189 phones, EHS (Electronic Hook Switch) capability is built in, but using it with wireless headsets requires either a Jabra Link 33 or Link 35 adapter, depending on the headset brand. For Plantronics/Poly wireless systems, the APV-63 EHS cable is the recommended adapter for J100 series phones.
Two important notes:
The J179 supports Bluetooth headsets natively, no adapter required for compatible Bluetooth devices. The J179 is the only model in the standard J100 range with built-in Bluetooth support.
The J129 does not have a dedicated headset port. The only compatible option is a wireless headset such as the Plantronics CS540; wired headsets cannot be used with this model.
After Connecting Any Headset
Test these before considering the replacement complete:
Press the headset button and confirm dial tone routes to the headset, not the handset
Make a test call and confirm the caller can hear you clearly
Confirm that the mute button on the headset works and reflects correctly on the phone display
For wireless headsets, confirm that remote answer (answering calls directly from the headset without touching the phone) functions as expected
A Note on Getting Parts
Replacement expansion modules and power supply units are available as refurbished units through reputable third-party vendors at significantly lower cost than new hardware. Carefully refurbished and tested IP500 expansion modules and cards are available at a fraction of the cost of new hardware from Avaya, a practical option for extending the life of an existing system. Verify that any refurbished module matches your exact model number before purchasing.
Need Help With a Hardware Replacement?
If a module won't come back online after replacement, a battery warning won't clear, or a new headset isn't working as expected, an experienced Telecommunication support company that offers Avaya maintenance and Avaya support can diagnose the issue quickly and get your system back to full operation without the guesswork.
Enroll in Our Email Course

Learn How a No-Nonsense IT Strategy Benefits Your Company:
Strategies to allocate your IT budget efficiently
Enhance cybersecurity defenses on a budget
Ensure your technology investments continue to serve your business as it grows
Let’s Take Your Business to the Next Level
Above all, we promise never to hit you with hidden fees. We won’t push the "newest, fanciest, coolest" tech trends just for the sake of it. We're here to deliver reliable, integrity-driven communication solutions that work better and more efficiently than what you may be managing in-house.
To find out if managed services is the right fit for your business, contact us for a free assessment.
77 W Washington ST STE, 1705 Chicago, IL 60602
Indiana Office
114 E Joliet St
Schererville, IN 46375
© 2026 Morgan Birgé. All Rights Reserved. Built With MSP Sites | Privacy Policy