How to Configure NTP and Time Zones on Avaya IP Office (Step-by-Step Guide) | Morgan Birgé
Step-by-Step Guide to Configuring NTP and Time Zones on Avaya Systems
Why Getting This Right Matters
An Avaya system with the wrong time is more than a cosmetic problem. Voicemail timestamps become unreliable. Auto-attendant greetings play at the wrong hours. Time-based call routing sends calls to the wrong destination. Scheduled reports run off-cycle.
All of it traces back to a single configuration decision: how the system gets its time, and whether that source is set up correctly. This guide walks through every method available, from the recommended automatic approach to manual fallback options for both IP Office and Server Edition deployments.
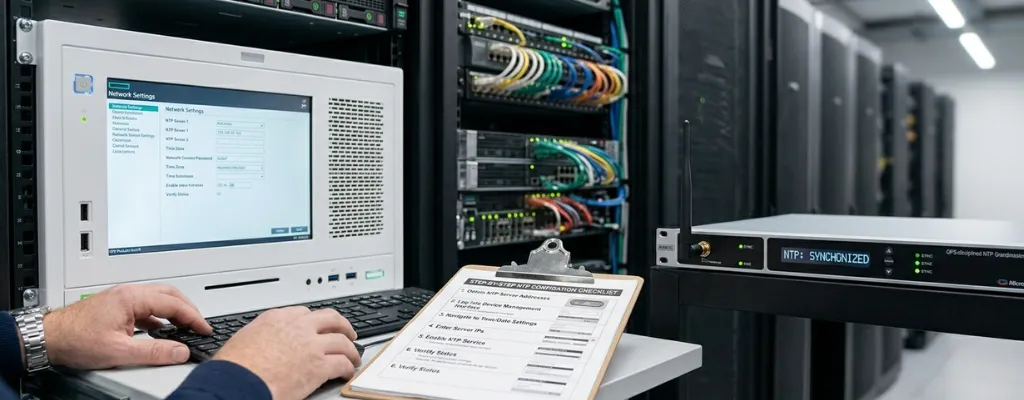
How Avaya IP Office Gets Its Time
Avaya IP Office doesn't have its own reliable internal clock. It depends on an external time source to stay accurate. The best method is to point the Time Setting Config Source to an SNTP server if you have a Windows network; pointing IP Office at the Primary Domain Controller keeps the phone system in sync with all other devices on the network automatically.
There are three source options available in IP Office Manager:
SNTP — syncs to an internet or local network time server automatically
Voicemail Pro / Manager — uses the Voicemail Pro server or IP Office Manager PC as the time source
Non—time is set manually from a designated phone
SNTP is the right choice for almost every environment. The other two options are fallbacks for situations where internet access isn't available, or a server-based source is preferred.
Part 1: Configuring SNTP on IP Office
Step 1: Open IP Office Manager
Launch IP Office Manager on your PC and receive the current configuration from the system.
Step 2: Navigate to the System Settings
Click on System in the left navigation panel, then select the System tab on the right.
Step 3: Set the Time Source
Locate the Time Setting Config Source dropdown. Change it to SNTP.
Step 4: Enter the SNTP Server Address
In the SNTP Server field, enter the address of your time server. Use one of these depending on your environment:
Your Windows Domain Controller IP: recommended if you run a Windows network; keeps IP Office in sync with all PCs automatically
0.pool.ntp.org: a reliable public server if no local server is available
If using a public SNTP server, entering multiple server addresses is recommended, as the system uses responses from each to determine reliability, and having backups prevents time drift if one server becomes unreachable.
Step 5: Set the Time Zone
Still on the System tab, locate the Time Zone field. Select the correct time zone for your office location from the dropdown. This is separate from the SNTP server address, which provides UTC time, and the time zone setting converts it to your local time.
Step 6: Confirm Daylight Saving Time
In most cases, the Avaya IP Office is configured for automatic Daylight Saving Time changes. Verify the DST setting is enabled if your region observes daylight saving time; without it, clocks will be off by one hour during the relevant months, regardless of how accurately the SNTP server is configured.
Step 7: Save and Merge
Click Save and then Merge to push the configuration to the system. The system will sync to the SNTP server within a few minutes. Verify the time displayed on any phone matches the correct local time.
Step 8: Check the Firewall
If the time doesn't update after a few minutes, the firewall may be blocking the connection. To reach an external SNTP server, the Avaya IP Office system needs the firewall configured to allow outbound access to that server, specifically, UDP traffic on port 123. Ask your IT team to confirm this port is open for outbound traffic from the IP Office system's IP address.
Part 2: Configuring Time on the Unified Communications Module
For IP Office Server Edition deployments that include a Unified Communications Module (UCM), time is configured separately from the main IP Office settings.
Step 1: Access the UCM Web Interface
Open a browser and navigate to the UCM's management address. Log in with administrator credentials.
Step 2: Navigate to Date and Time Settings
Go to Settings > Date and Time.
Step 3: Enable NTP
Select Enable Network Time Protocol. In the NTP Servers field, enter the IP address of your NTP server. Enter each address on a separate line. The UCM defaults to using 169.254.0.1, which points to the IP Office system itself. When this default is set, the IP Office system must be independently configured to get its time from an external SNTP server, or the entire chain has no accurate time source.
Step 4: Set the Time Zone
Select the correct time zone from the Timezone dropdown. Note that changing the time zone in the UCM interface can trigger a "Session expired" message in the browser. This is expected behavior. Log back in and verify the time zone saved correctly.
Step 5: Save the Settings
Apply and save. Verify the displayed time is correct for your local time zone.
Part 3: Configuring Time on Avaya Media Servers
For larger Avaya deployments using dedicated media servers, NTP configuration is handled through the Configure Server wizard.
Specify up to three network time servers by IP address or DNS name in the order you want the media server to check them. Always specify at least two for redundancy. An important operational note: after NTP is enabled, time changes greater than 15 minutes will disrupt synchronization with the NTP server, and NTP will shut down. Large manual time corrections must be applied carefully to avoid breaking the NTP sync.
Common Configuration Mistakes to Avoid
Getting SNTP or NTP configured is straightforward, but a few specific mistakes cause the majority of ongoing time problems on Avaya systems.
Missing time zone setting: Setting the SNTP server without setting the time zone results in UTC time displaying on phones, which will be hours off for most locations
DST not enabled: Phones will be one hour off during daylight saving months
Firewall blocking port 123: The system silently fails to sync without any visible error on the phone display
UCM left pointing to default 169.254.0.1 with no external source: Creates a circular dependency where neither the UCM nor IP Office has an accurate time source
Large manual time corrections after NTP is enabled: Time changes greater than 15 minutes after NTP is active will cause NTP to shut down. If a large correction is needed, disable NTP first, adjust the time manually, then re-enable NTP.
Quick Reference: Configuration by System Type
IP Office — SNTP: System tab in IP Office Manager > Time Setting Config Source > SNTP > enter server address > set time zone > enable DST > save and merge
IP Office — manual: Set source to None > grant System Phone Rights Level 2 to a user > set time from phone using Feature key > System Admin > Time
UCM: Settings > Date and Time > Enable NTP > enter server addresses > set time zone > save
Media server: Configure Server wizard > Network Time Servers > enter up to three server addresses > avoid manual changes greater than 15 minutes after NTP is active
Need Help Getting Your System in Sync?
If your Avaya system keeps drifting, shows the wrong time after DST changes, or the SNTP configuration isn't taking effect, a qualified Avaya support provider can identify exactly where the configuration is breaking down and resolve it permanently.